
After numerous attempts at filling and re-sealing I still have a leak.
Unfortunately I cannot find the source. I am not sure what my next step is
going to be but I will be taking a break from this project. You tube
consistently keeps rejecting my videos all of a sudden so there will be no
video up date this time around. I did fill the tank and sump (which does
not leak) this afternoon and I also finished the plumbing for the filter.
I temporarily put the pump in and tried to run a cycle on the tank.
Unfortunately the tank is going to need another bulkhead to feed the sump
as the pump almost overflowed the tank while simultaneously draining the
sump tank. According to my calculations each inch of the tank is 39.83
gallons and it takes two inches to fill the pipes in the filter system so
roughly 80 gallons to get the filter running. But again, the sump is not
getting fed fast enough. In theory the sump should be half full when
running normally and completely full when sitting idle or during a power
outage. If when I add another bulkhead to the tank it is still not enough
then the sump tank needs to be larger. I find this hard to believe since
this is the same pump that ran the 800 with zero issues in a sump tank
that held only 115 gallons or so. The only difference is 12 gallons of
water per inch in the addition. In my opinion 24 gallons is not enough of
a difference to warrant a larger sump tank than 163 gallons. The major
difference is one less bulkhead, one less feed to the sump.
That is where we stand.
I need to work tomorrow on a small job that should take less than 12 hrs
to complete, so nothing is going to get done tomorrow.
Here is a punch list of things that need to happen before full operation
and stocking of fish:
1.) Fix the leak.
2.) Install the under gravel jets and spray bar.
3.) Add a bulkhead and another run to the sump.
4.) Install and connect the heat coil.
5.) Make lids.
6.) Test everything for a week.
7.) Drain and decorate.
8.) Stock.
2-8 are very easy steps. Its one that Ive got an issue with. The only
feasible idea I have is to re-coat the entire tank by spraying it. Other
than that Im open to ideas. I believe Im only a few clicks away from
reaching my limit of patience. Honestly, Im past patience and frustration
and have moved right onto the I dont care anymore stage! LOL
So please. Any and all ideas are welcome.
Jonathan (aka TheFishGuy aka MonsterFishRescue)
Results 41 to 50 of 69
-
Mon Feb 16, 2009, 01:47 AM #41Larvae

- Join Date
- Oct 2007
- Location
- North East Ohio
- Posts
- 102
Have a fish you don't know what to do with?
www.monsterfishrescue.com
Adopt a Fish!
Click Here to Order Your New RTC Shirt Now!
-
Mon Feb 16, 2009, 10:23 AM #42Wrigglers
- Join Date
- Aug 2005
- Location
- Brisbane, Queensland, Australia
- Posts
- 299
Jonathan,
Off the top of my head....Have you filled the lower secton of the tank and let that stand to see if the leak comes from that section?
What about shaking some baby powder over the bulkheads (on the outside) to see of there is any water seepage from the underside of the connections.
Have you checked for drips from the pipework beneath the tank?
Only other thing I'm thinking of is that if all the above turns out NOT to the leakage source, then reverting back to your joints. From my memory of the videos, most of them were fairly substantial, but some of the joints had small pin-holes. Assuming the bottom of the tank will be covered with a substrate of some kind, its aesthetics don't matter. Why don't you try putting lots of silicon along the bottom joints on the inside of the tank. When the silicon has cured, try filling the tank again and letting it sit. This will prove the bottom edges are either sound or not.
Using the same logic, seal the inside edge between the lower portion and the main section of the tank with lots of silicon.
Are you sure the pond armor layers on the flat surfaces are thick enough? In some of your footage the layers look thin in that you can see the lighter white colour coming through.
If you spray, will the product you're going to spray with stick to the pond armor?
Hope this helps. Keep going. It'll get there. Wish you were in Brisbane Australia, would love to give you a hand.
Cheers,
Dwayne
-
Wed Feb 18, 2009, 03:34 AM #43Larvae
- Join Date
- Oct 2007
- Location
- North East Ohio
- Posts
- 102
I wish I was in Australia too... That's one place I'd love to live! It's funny you mention silicone:
Up Date:
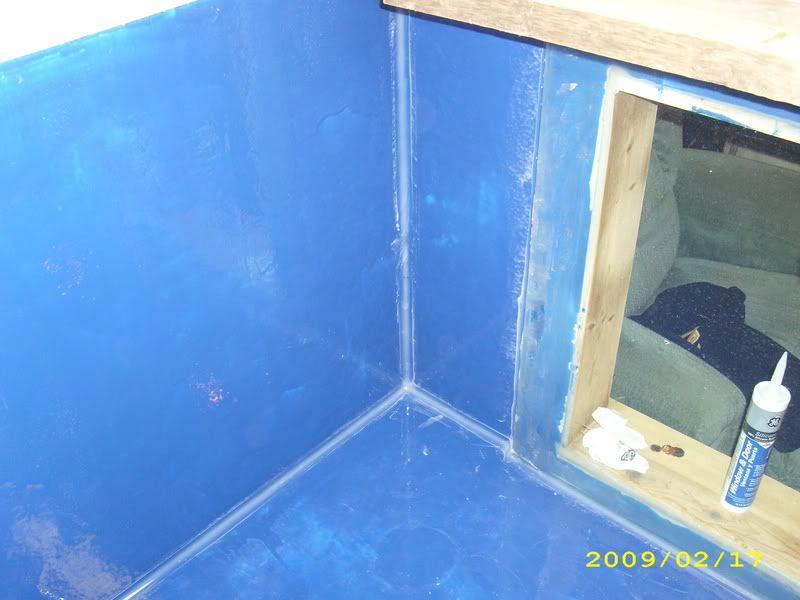
Since you tube is not cooperating were going to do this up date old school I got the entire tanks seams siliconed this afternoon. By the time I was finished (which it only took about 20 minutes) my eyes were burning! LOL I was able to keep the door open and theres an exhaust fan just a few feet away in the small bathroom/laundryroom in the basement that I was able to keep on and it took care of most of the fumes from the silicone Actually I think Im still HIGH LOL. Heres some pictures of that:

I also decided there wasnt any reason the heat coil couldnt be ran so I did that too That really only took about 30 minutes seeing as I already had the thermostat wired and the pump installed. Ill re-cap how this is intended to work. I might even go super old school and do a drawing in paint! Yeah Lets do that:

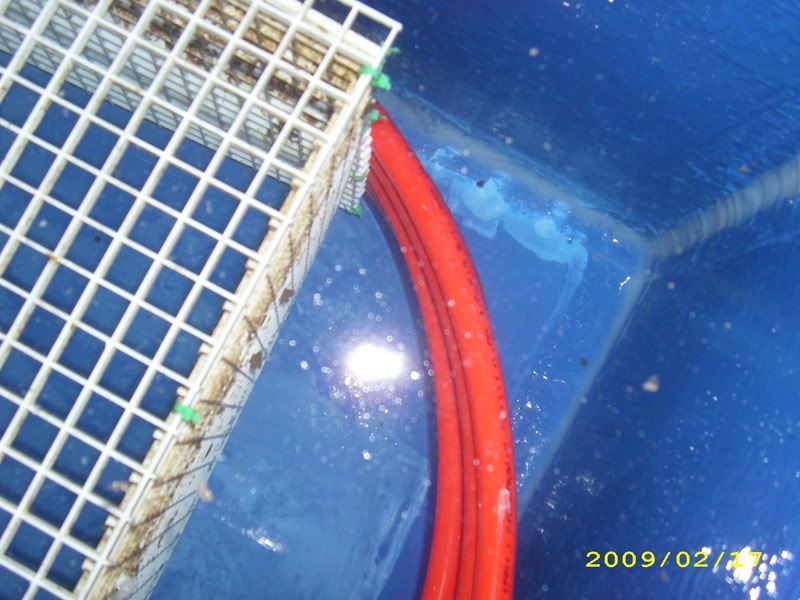
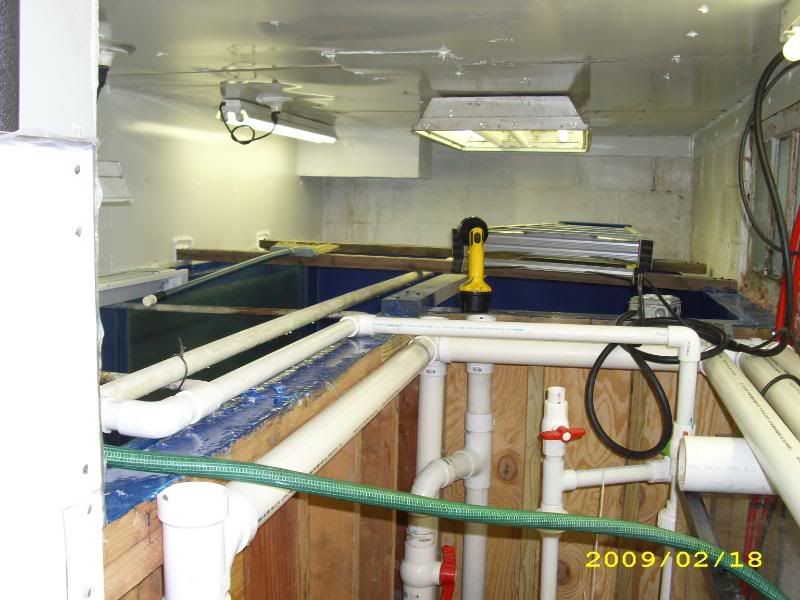
So heres some coiled in the sump around a cage made from eggcrate from an old project. When I run out to my shed Im going to grab a bunch of zip ties to separate the coils so theyre not touching each other. Hence the eggcrate And it got the dang thing out of the way in the fish room! LOL
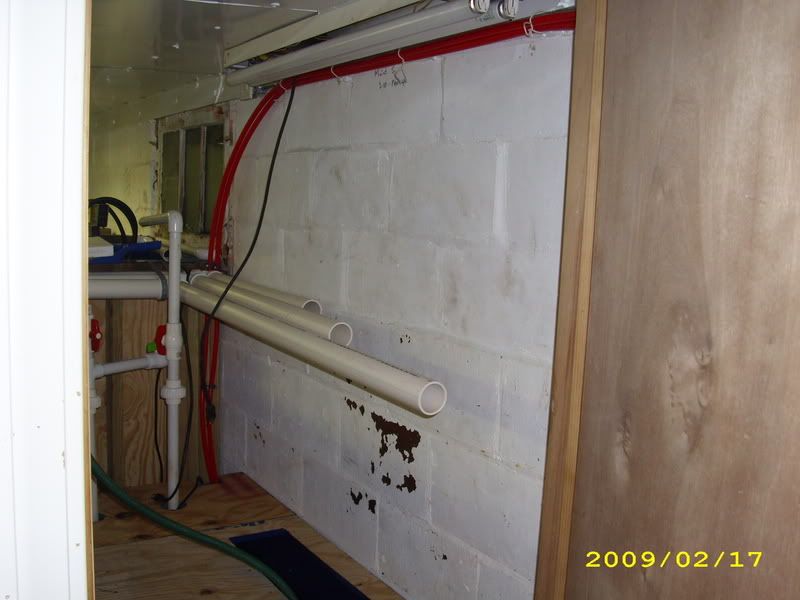
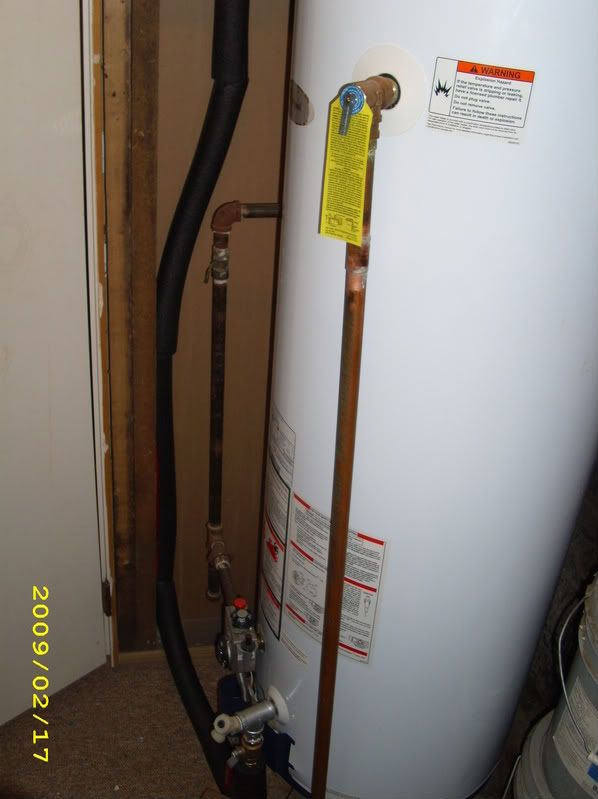
Heres a shot of the heat lines running into the tank room and down into the sump. As you can see I took the 55 out in order to do this:
Heres the pump mounted about 5 up in the laundry room/little bathroom (which is essentially just a toilet, my toilet according to Dominic! LOL)
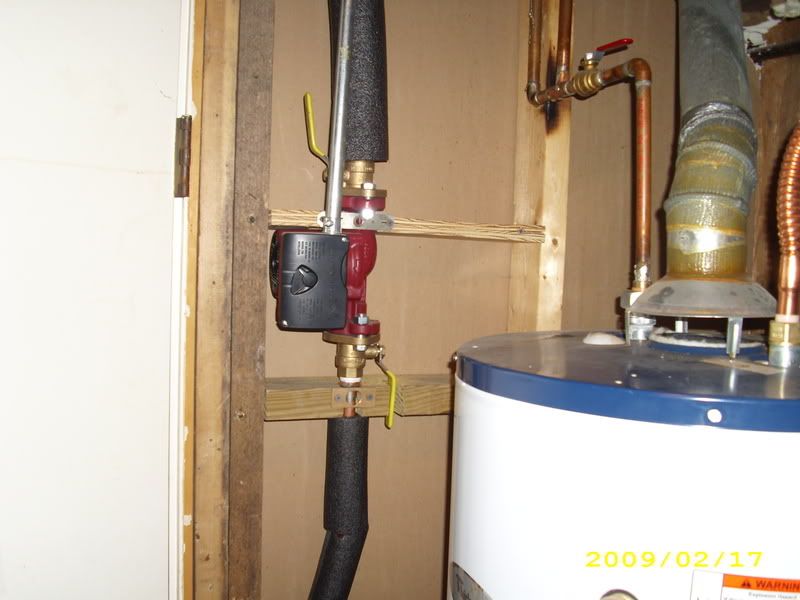
And heres where you can see it going into the drain cock of the water heater.
Now I couldnt just hook this up and not test it So I filled the sump with 46* water and set the thermostat to 60* Well see how it does Of all the upgrades Im doing to this tank this is the one Im most excited about, well that and now Im on the hunt for a giant piece of drift wood Maybe Ill just go cut a tree down in the back and wedge it in the tank so it doesnt float OOOO Chainsaw!
Thats it in a nutshell, hopefully tomorrow will be a good day and well have no more leaks. Im goingto get on the horn with you tube and see whats up their rear lately Dont they understand the importance of this? Sheesh the nerve
As always, if theres any questions feel free to ask! I will do my best to typ out an answer for you cuz you guessed it you tube sucks!
Ps. Sorry for the book, but it would have only been a short video to listen to if you tube didnt suckHave a fish you don't know what to do with?
www.monsterfishrescue.com
Adopt a Fish!
Click Here to Order Your New RTC Shirt Now!
-
Wed Feb 18, 2009, 11:07 AM #44Hi, I'm New Here!
- Join Date
- Nov 2007
- Location
- Brisbane
- Posts
- 7
fingers crossed.
nice work on the heater setup.
cheers
-
Wed Feb 18, 2009, 06:28 PM #45Moderator
- Join Date
- Apr 2008
- Location
- China
- Posts
- 2,283
How much is this project costing. It's not for the normal wage earner is it?
Why me ?
-
Wed Feb 18, 2009, 06:41 PM #46Larvae
- Join Date
- Oct 2007
- Location
- North East Ohio
- Posts
- 102
Um... I'm a carpenter... You don't get much more "normal waged" than that.... So far the addition and basic rebuild has cost $1500 roughly. When it's all said and done I will be posting various interesting stats on everything....
As for the heat... I'm impressed thus far... 150 ish gallons went from 46* -66* in under two hours! Then for fun I put it up to 80* this morning LOLHave a fish you don't know what to do with?
www.monsterfishrescue.com
Adopt a Fish!
Click Here to Order Your New RTC Shirt Now!
-
Thu Feb 19, 2009, 04:19 AM #47Larvae
- Join Date
- Oct 2007
- Location
- North East Ohio
- Posts
- 102
Up Date:
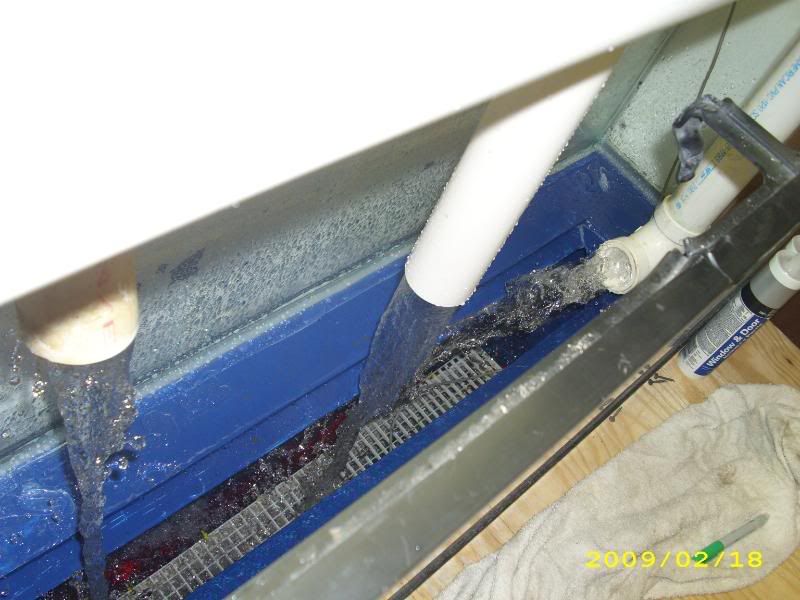
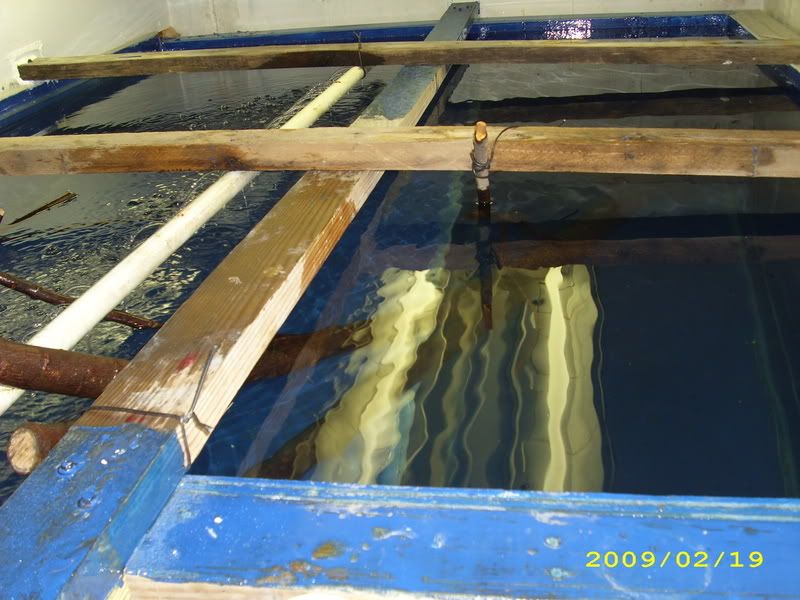
Well . Its been two hours and SHE HOLDS! The extra pipe running back into the sump because the pump was a little too much seems to be doing its job well! The tanks been running for about an hour now and all seems to be well!!!!!!!! So let me ask you Did you enjoy the drama? LOL I didnt. It took over six hours for me to fill this time, and my feet hurt from pacing back and forth! But who cares about me I took a few pictures so we can go step by step through the saga of filling
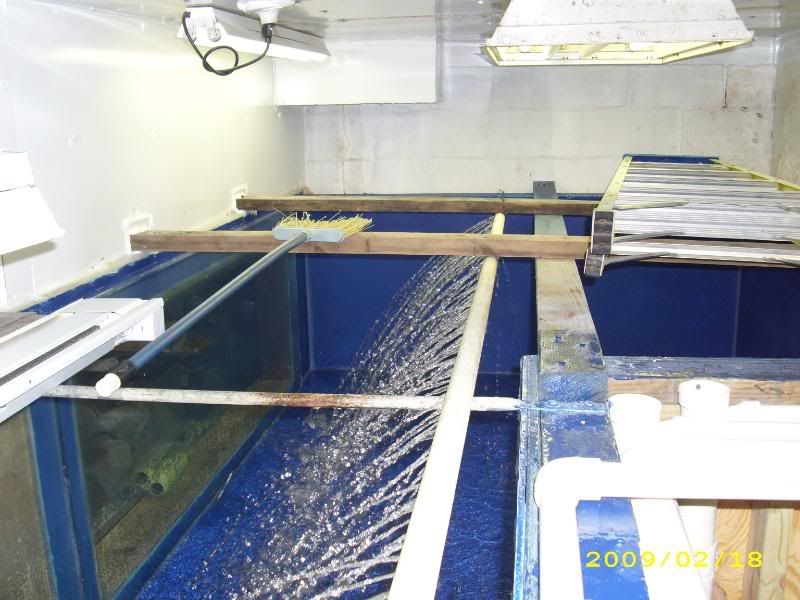
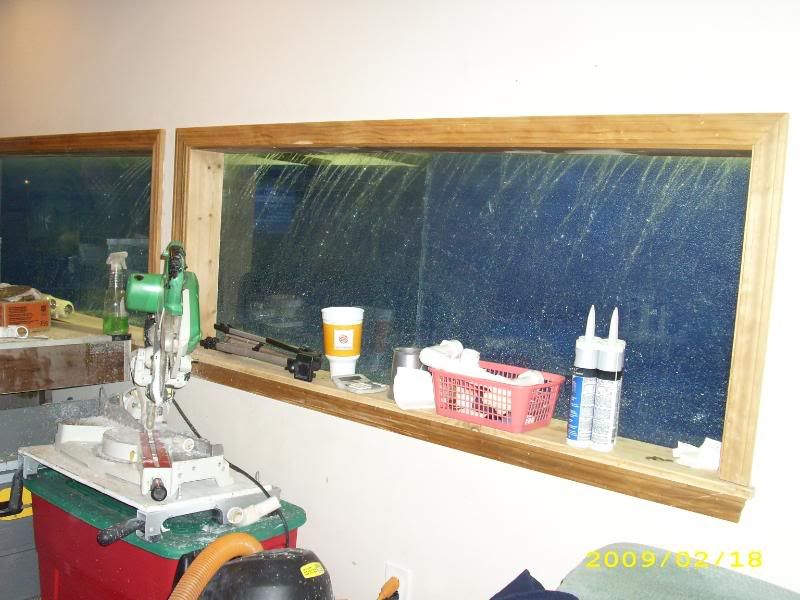
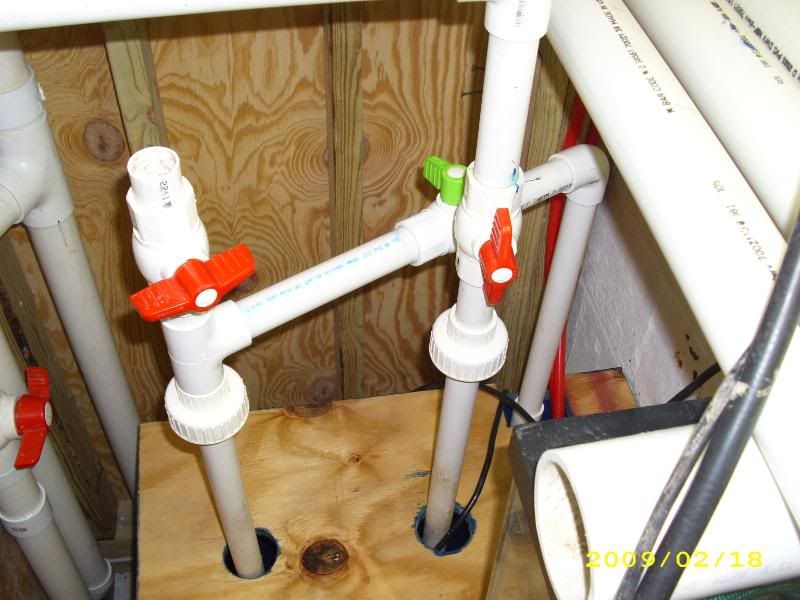
In this picture youll see that Ive got the spray bar plumbed in. I decided in order to force myself to slowly fill the tank that I would fill the sump, shut the water off, then use the pump to pump the water into the tank. Then while the sump was filling from the tap again it would give me time to inspect everything. Then with one final inspection after the sump was full Id plug the pump in adding 150 ish more gallons to the tank. It took eleven times in order to completely fill the tank.
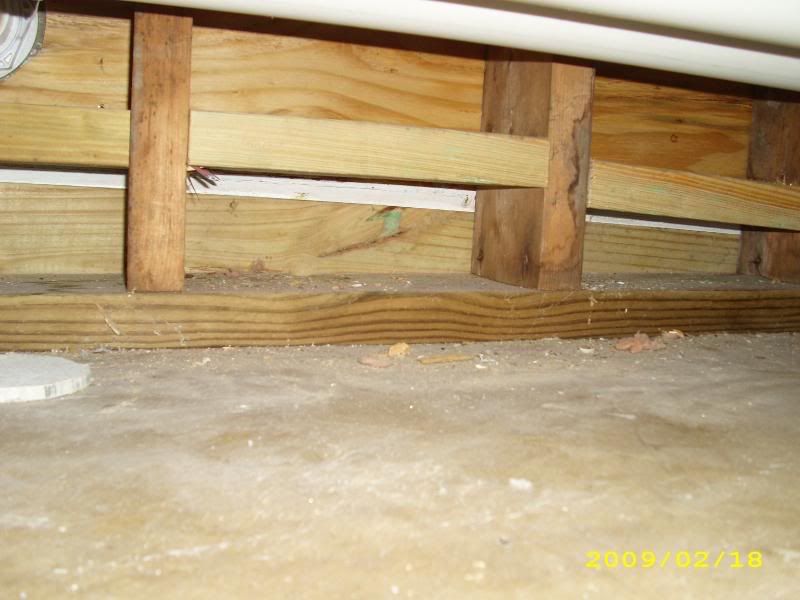
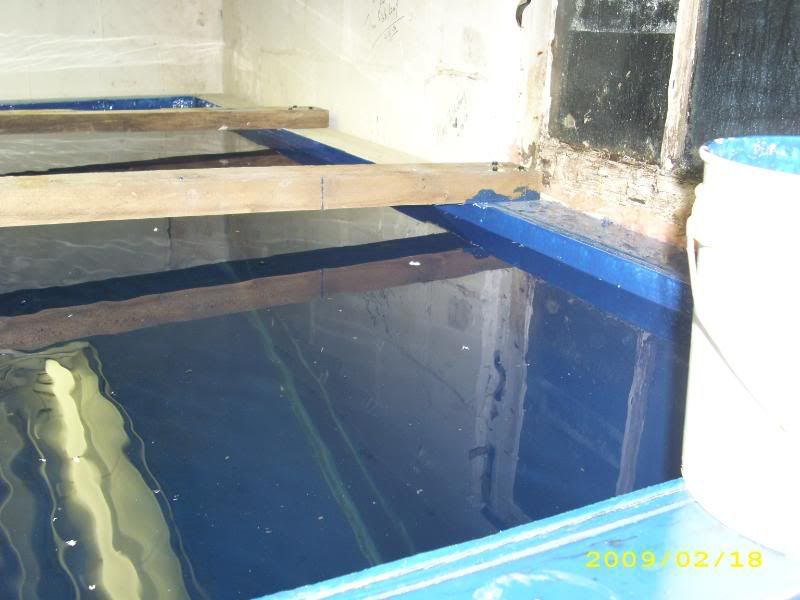
Here are the spots where it leaked every other time it was filled. These were the spots where I closely inspected about five times after every time 150 ish gallons was put in the tank. The white line that you see in the pictures is the ¾ decking of the deep end, water would slowly dribble out from the top of it:
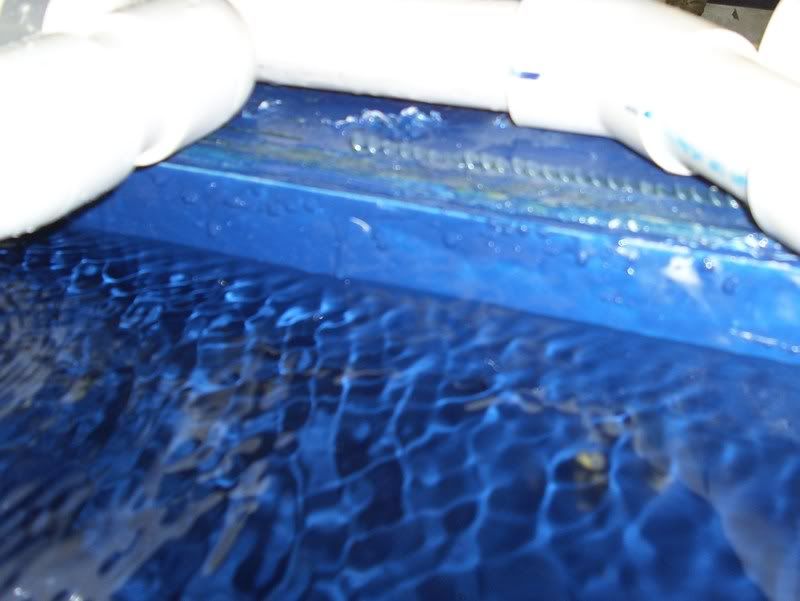
Now heres the spray bar in action giving the tank a nice shower every half hour or so:
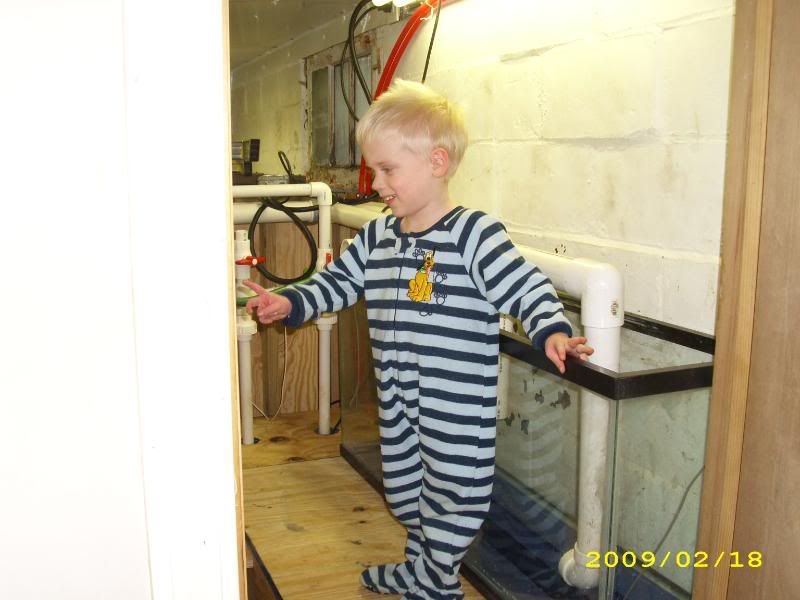
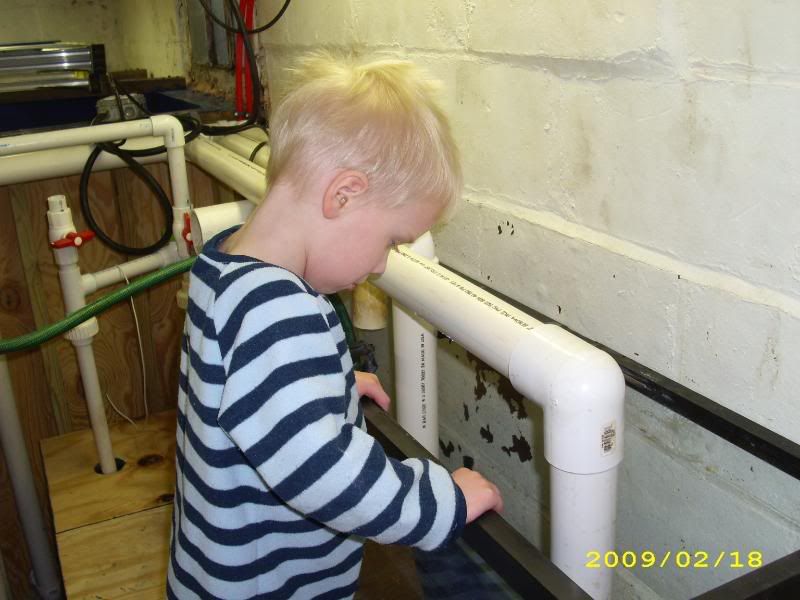
And heres Max coming to inspect my work! LOL Future county building inspector! LOL
And heres a slide show of the fill:

Then when the tank spilled a tiny bit of water into the sump tank I stopped filling it and started to just fill the sump tank. When both containers were at maximum then it was sitting at what I call Idle This mimics a power outage or when I unplug the pump to do a water change.
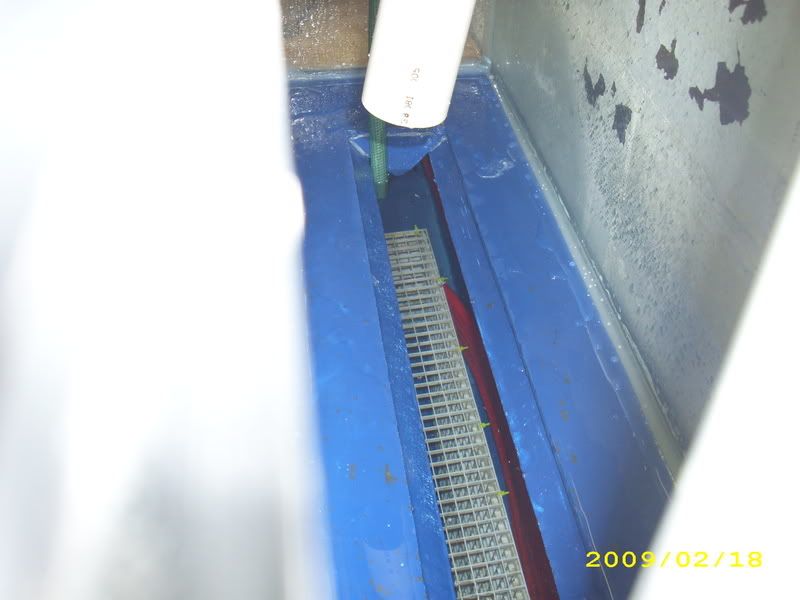
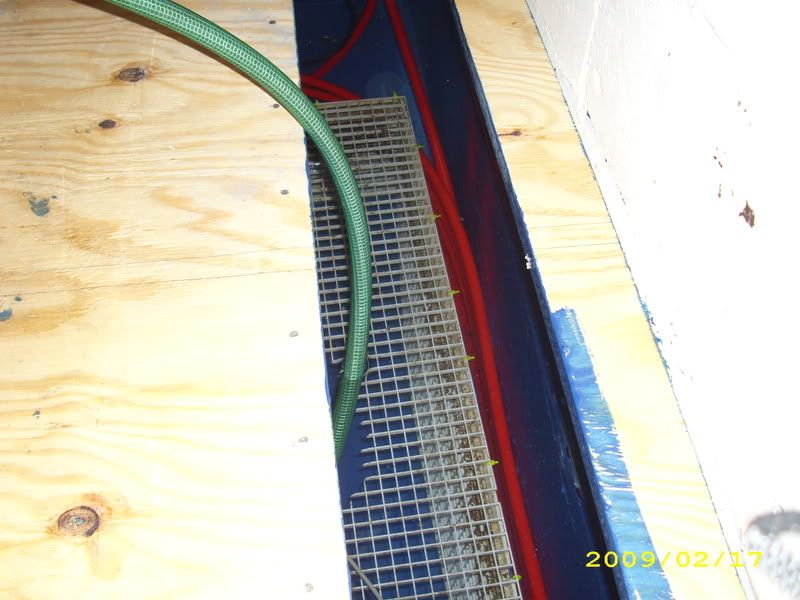
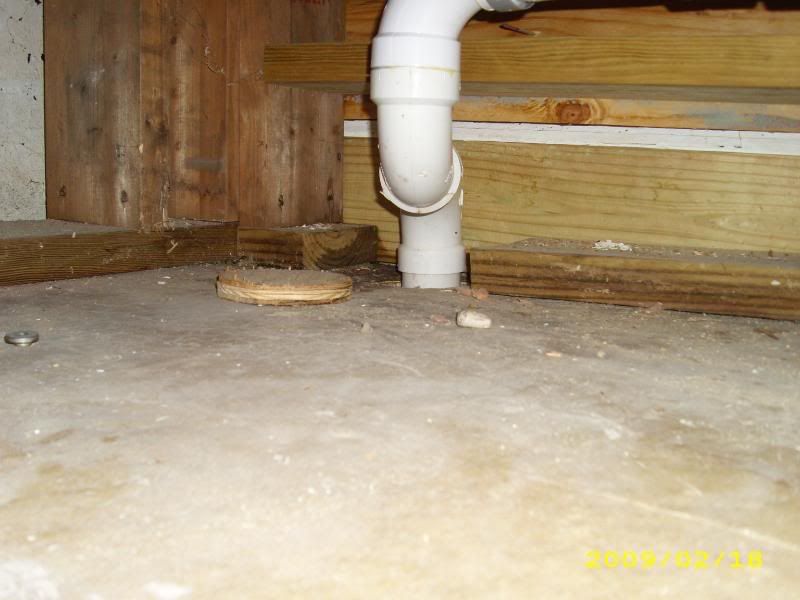
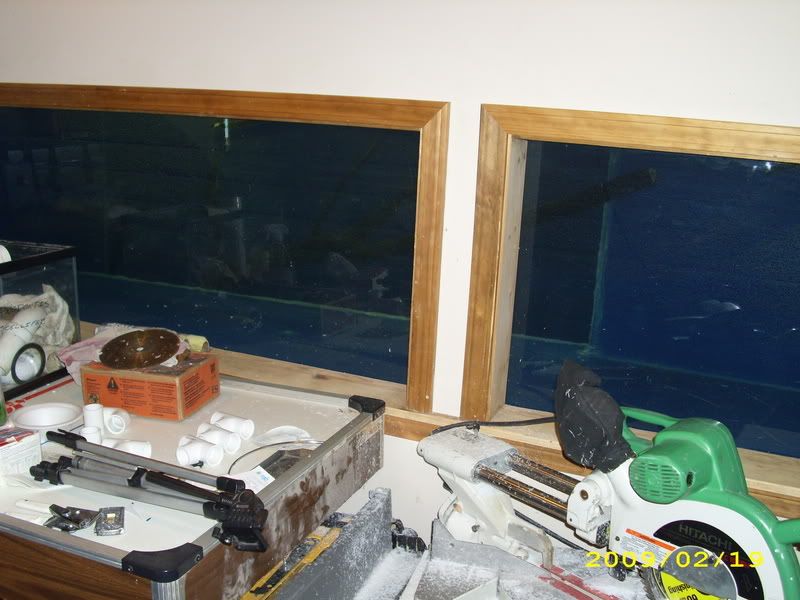
Somewhere in the middle of filling the tank I completed the plumbing return lines and the overflow line back to the sump:
Heres the overflow line:
Unfortunately I did not get a picture of the line that feeds the under gravel jets. But its nothing exciting really, and hopefully you tube will let me get some videos up to night Youll see it then
Since everything was plumbed and the tank and sump were full it came time to fire it up, and fire it up we did. Everything seems to work well, the water level has stayed the same though I did have to tone down the spray bar a bit. My theory is that once all the jets are in place it might slow things down enough where neither return line will have to be toned down.
The water level is holding steady at about an inch and a quarter down from the top. I wanted and inch and a half but whats a quarter amongst friends? LOL
p.s. I did and have been shooting video so hopefully some day you tube will remove its head from its rear and allow them to get uploaded! I will not cheat anyone of the videos! BUT Im considering making DVDs of the whole process and selling them for like $5 to help fund the project and MFR. Think theyd sell? Of course thered be bonus content of the fish room and videos I didnt upload Like my little rant about Sanitred LOL
Sorry about the massive post and tons of pictures taking forever to upload. Some sites only allow five pictures per post so on those sites Ill be making multiple posts! Thanks again for looking And oh, in the past hour or so the tanks temperature has gone up FIVE degrees!
TFG, MFR, JJSHave a fish you don't know what to do with?
www.monsterfishrescue.com
Adopt a Fish!
Click Here to Order Your New RTC Shirt Now!
-
Thu Feb 19, 2009, 07:16 PM #48Larvae
- Join Date
- Oct 2007
- Location
- North East Ohio
- Posts
- 102
I had a small confrence to go to this morning but when I got home I got this incredible burst of energy... I went out back and cut the top off a tree I cut down last year and put it in the tank! LOL It's 9' long, and the picture isn't all that great because of the bubbles on the glass... I couldn't find my magna sweep
Not only that but I got a half a ton of wash stone and brought most of it down to get ready to rinse it It was fun carying two five gallon pails full down stairs at a time... 12 buckets should do it...

AND I also brought in all of the decor that was under the pond liner outside the back door...
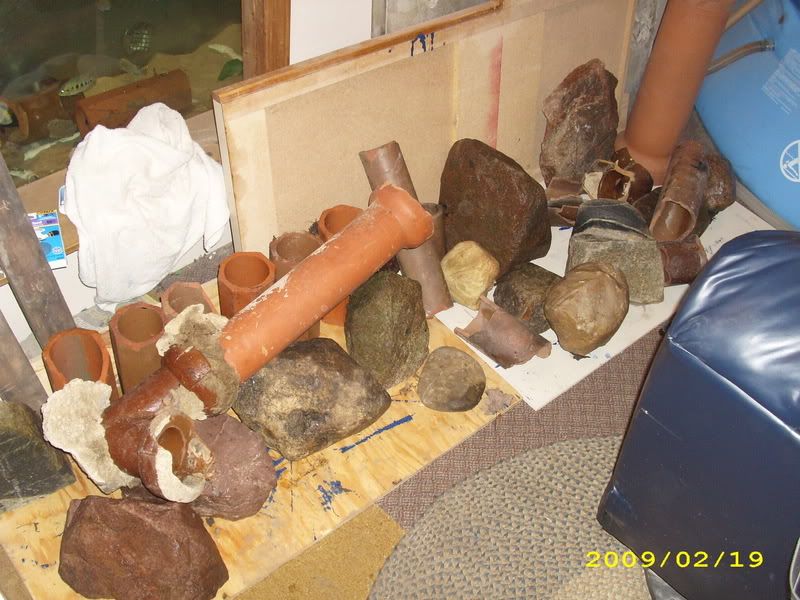
I'm begining to think there's seriously somethng wrong with me
As for the tank, the pump is dialed in and working well, things might change with that once all the jets are in but I'll deal with it... I plugged the pump back in at 6:45 am this morning and the heater had gotten the sump water up to 80*. After being gone for four hours the tank it's self climed 11* up to 72*... Then I decided to shut the thermostat off, there was no real reason to heat the tank up just to drain it Saturday AM... After I'm done posting it's down to the fish room for a few hours to start cleaning gravel, then I've got parent teacher confrences to night... I hate when life gets in the way of fun stuff... anyone wanna come over and rinse a half a ton of gravel?Have a fish you don't know what to do with?
www.monsterfishrescue.com
Adopt a Fish!
Click Here to Order Your New RTC Shirt Now!
-
Mon Feb 23, 2009, 03:25 AM #49Larvae
- Join Date
- Oct 2007
- Location
- North East Ohio
- Posts
- 102
The jets were installed Friday night alond with the bark getting stripped off the wood and the cross bucks getting painted with drylok:

Its been a long time comin but the fish are in! The tank is full and holding just fine. The temperature last nite in the tank was only 71* As of this morning it was 77* We took a lot of pictures so heres a slide show again for you. I was just too pooped to get to posting last nite

Once the deep end was full with water from the pond I started to stock the tank and the first fish to venture into the rest of the tank was a female jaguar cichlid. Soon after it seemed everyone wanted to be up there. LOL The only fish I havent seen yet is the larger of the two iridescent sharks, but I expected that
Heres a list of whats been put in so far:
Paco the pacu 22
Female Jaguar 8
Iridescent shark 15
Iridescent shark 12
Mad Barb 15
Common pleco 17
Leopard Sailfin Pleco 16
Synodontis euptrus 7.5
Tiger Oscar 10
Common Oscar 12
Tiger Oscar 9
Silver Dollar 5
Fire Mouth 5.5
Bocourti 11
Lemon Severum 4
Green Severum 7.5
Midas 9
Black Belt 10
Bocourti 10.5
Jack Dempsey 6.5
w/c Midas 10
Convict 8
Female Nicaraguan cichlid 5
Uaru 5
Male Nicaraguan Cichlid 6
Male Robertsoni Bob 9.5
Midas/???? Hybrid 8.5
Belly Crawler pike cichlid 6
Male Salvanii 6
Black Belt 9
Black belt 8.5
Synodontis Notata 10
Synpilum 11
Male Jaguar cichlid 9
Male Red Terror 8
Black Belt 9.5
Female Jaguar cichlid 7.5
Silver Dollar 5.5
Silver Dollar 5.5
Midas 8.5
Midas 8.5
Intermedious 8.5
Intermedious 8.5
Midas 8.5
Tilapia Mamfe 7.5
Red Bay Snook 5
Blue Acara 5
Pim Cat 10 Silver Dollar 7
Female Nicaraguan Cichlid 4
Today I did water changes on all the other tanks and moved some more fish in:
Male Paratilapia polleni 8
Female Paratilapia pollen 7
Female Paratilapia pollen 6
Tilapia Marae 4.5
Tilapia buttikoferi 5
Synodontis ocellifer 8
Ctenopoma Kingsleyae 8.5
Ctenopoma Kingsleyae 7.5
Ctenopoma Kingsleyae 7
Ctenopoma Kingsleyae 6
Siamese bumble bee catfish 7.5
Leopard Sailfin Catfish 16Have a fish you don't know what to do with?
www.monsterfishrescue.com
Adopt a Fish!
Click Here to Order Your New RTC Shirt Now!
-
Fri Feb 27, 2009, 10:22 AM #50Hi, I'm New Here!
- Join Date
- Nov 2007
- Location
- Brisbane
- Posts
- 7
Well Done.

 Reply With Quote